Building Your First Herculus App
In this guide we are going to create a simple Herculus application. Let's assume that you are working as a freelancer and that you want to have a tool that
- tracks how many hours you worked for which client, and
- allows you to create a PDF invoice that you can send to your clients at the end of the month.
By building such a tool with Herculus, you will learn how to
- organize your data into different tables,
- create relations between them,
- process your data to generate new data using formulas, and how to
- generate reports from your data.
Create a new Project
After logging in, the first thing we are going to do is create a new project (call it, for example, Freelancing).
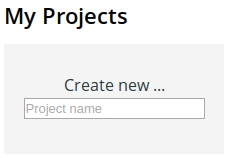
Enter the name on the Create new... card and press Enter. This will create
the project and bring you to the Project page.
The First Table
A project consists of several tables which are filled with your data. Since our project was just created, there are no tables yet. Let's create one. Focus the Add table... input field, and enter the name:

Our first table will be the collection of clients that we work for, so we will call it Clients. After you press enter, the table will be created and opened. Naturally, every table consists of columns and rows. We can add rows or columns by pressing the bottom left or top right plus icons, respectively. In our case,
- each row will correspond to one of our clients
- each column will correspond to an attribute that a client has.
Adding Columns
Let's first create a couple of columns for every attribute that we might need. Press the top right plus icon and select New data column:
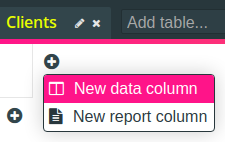
Don't worry about what a report column is, we'll get to that later.
Every column has a name and a type. The type is the kind of things that all
the cells in this column contain. For example, since all our clients have a
name, we'll give the first column the name Name, and since client names are
strings, we'll give the first column the type String.
The name of the column can be easily changed by clicking on the gray "Name..."
placeholder, entering the name and then pressing Enter. In order to change the
column's type, click on the gear symbol next to the column name:

The popup dialog shows two things: On the left, you can choose the
column type from a dropdown menu, and on the right, you can edit the formula
that is used to compute the data in this column (more on that later). So, choose
String from the dropdown menu, and click Save.
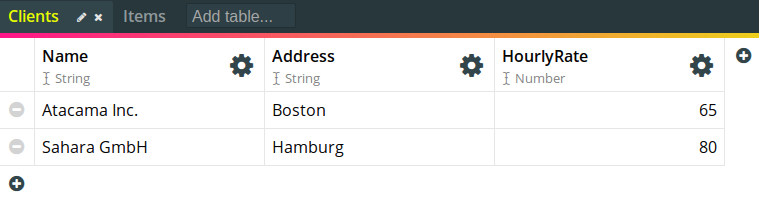
For our clients we want to have a second column for their address, which also
has the type String, and a third column, which will be the hourly rate that
you negotiated, of type Number. After you have added these columns, the table
should look like this:

Adding Rows
After we've defined the two columns, it's time to add some clients to this
table. This is done by simply clicking on the lower left plus symbol (add
row). Once you have added a row, you can simply fill the cells by clicking
inside them and entering the strings. When done, just press Enter. After
adding two clients, the table might look like this:
A Table for Billable Items
Now that we have a place to manage our clients, let's move to the next table. We add a table called Items, which will be a list of billable items.
Each item that we might want to add to the list needs several attributes:
- The date of the item
- The client who will be billed for this
- How many hours you worked
Therefore, we add three columns to the items table:
- Date of type
DateTime - Client of type
Row from Clients - Hours of type
Number
The type Row from Clients is different from those we've seen so far, since it
refers to one of the tables in this project. It says that, for every cell in
this column, there needs to be a reference to a row from table Clients. If
you're familiar with relational databases like MySQL, this is would be something
like are foreign key to Clients. In order to configure this, choose Row as a
column type, and then Clients from the dropdown menu that appears below it,
like so:
After you've added all these columns, the table will look like this:

We can now fill the table with some dummy items. Values of type Time can be
conveniently entered using a datepicker. And Client rows can be selected from
a dropdown menu. For example, you could enter the following data:

The First Formula
This is a good time for adding the first piece of data processing to our tool, by creating a column with a formula. Specifically, we may want to calculate the amount billed for every item, which is the the rate that we negotiated with the client of this item, multiplied by the number of hours we worked.
Reasons for having such a column might be that, first, it's convenient to see how much will actually be billed for every item, and second, that we can use this amount for further data processing downstream when we generate the bill.
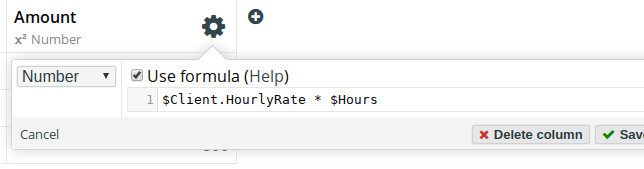
In order to generate this data, we create a new column named Amount with type
Number. Then, while the column config dialog is still open, we tick the Use
formula checkbox, and enter the following formula:
Then click Save. There are two things to note:
- Since the data in this column is derived from a formula, it is not editable. You can recognize this fact by the small x-squared symbol next to the column's type.
- The data in this column will be always kept up to date when the data it depends on changes, like in a spreadsheet.
The formula we entered is relatively simple: We access the cells from the
Client and Hours columns with the $ character. Since the value of a
Client cell is a row from the Clients table, we access the HourlyRate
column of that table with the dot . character. Again, if you're familiar with
relational databases, this would be done by a join, and if you're familiar with
spreadsheets, this would be done using the "vlookup" function.
If you want to read more about how to acces data from other columns and tables, see Accessing Data From Other Cells.
The Bills Table
We are now prepared for the final table that will put everything together. Imagine it's the end of the month and you want to send out your bills. For every bill, you need the following information:
- The period which this bill covers
- The client you want to generate the bill for
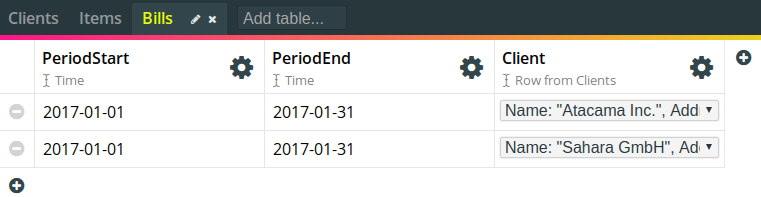
Therefore, we will create a table called Bills with the following columns:
- PeriodStart of type
DateTime - PeriodEnd of type
DateTime - Client of type
Row from Clients
After doing this and adding some data, the table might look like this:
We are now done with modeling of all the data that needs to be entered by you (the user). Now we get to the most interesting part: generating the actual bills. We'll do this in two steps:
- Derive the list of items that are part of each bill
- Write a template that will render to the bill you can then print
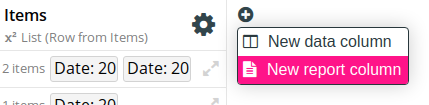
Deriving the Included Items
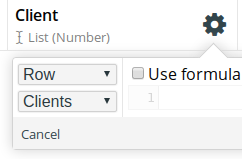
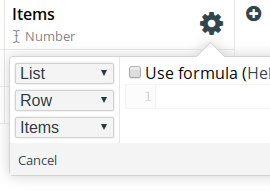
For step one, we create a new column, called Items, which will be of type
List (Row from Items). This means that every cell in this row has as its value
a list of (references to) rows from the Items table. For more information on
the List type, see Types. You can configure the
column to have that type by selecting List from the first dropdown, Row from
the second, and Items from the third:
Next, since the values of the cells in this column will be derived by a fomula, check the Use formula checkbox, and enter the following formula into the editor:
includeItem item =
     item.Date >= $PeriodStart
  && item.Date <= $PeriodEnd
  && item.Client == $Client

filter includeItem #Items
This formula is slightly more complicated than the previous one, and you may want to read the Formulas Manual to better understand it. Basically, we are doing two things:
-
First, we define a function called
includeItemwhich, for some givenitem, tells us whether it should be included in the list we are computing. There are three conditions that all need to be met (so we are combining them with the "and" operator&&):- The item's date needs to be larger than or equal to the start of the period of the current bill (where "larger" means later). Keep in mind that the formula is evaluated for every cell in the column, which in this case represents a bill.
- The item's date needs to be less than or equal to the end of the period we are considering.
- The client that is selected in the item is the same as the client that the current bill is for.
-
Second, we filter all the rows from the Items table according to the function we just defined. In this case, the filter function takes two arguments:
- A function that takes a
Row from Itemsand returns aBoolean. theincludeItemis precisely such a function. - A list of such rows:
List (Row from Items). The argument we supply,#Items, refers to the Items table, which is precisely such a list.
It then filters the list given by the second argument, keeping exactly those elements for which the
includeItemfunction returns true. - A function that takes a
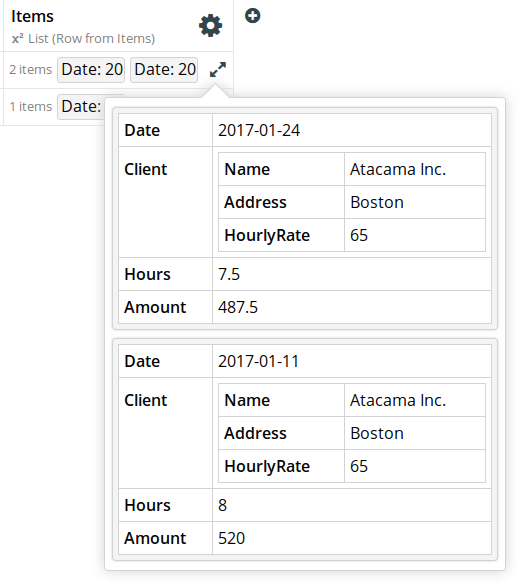
Now click Save. If you entered everything correctly, every cell in this column will now contain a list of the items that are billable to the respective client in the respective period. You can click on the symbol with the two arrows to expand the cell content:
The Printable Bill as a Report
We will create our bills by writing the template for a Report Column. First, create the Report Column named Bill right next to the Items column:
We want to write the template in HTML and generate a PDF file as output. Therefore, in the column configuration dialog, select HTML as the Input language and PDF as the Output format:
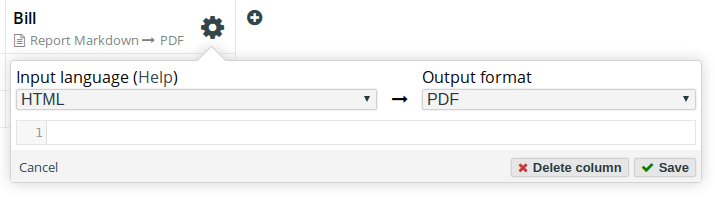
Then, paste the following template into the template editor in the config dialog:
<h2>Bill To</h2>

<b>{{ $Client.Name }}</b>, {{ $Client.Address }}

<h2>Items</h2>

<table>
  <thead>
    <tr>
      <th>Date</th>
      <th>Hours</th>
      <th>Rate</th>
      <th>Amount</th>
    </tr>
  </thead>
  <tbody>
    {% for item in $Items %}
    <tr>
      <td>{{ formatDateTime "%D" item.Date }}</td>
      <td>{{ formatNumber "%.2f" item.Hours }}</td>
      <td>{{ formatNumber "%.2f" $Client.HourlyRate }}</td>
      <td>{{ formatNumber "%.2f" item.Amount }}</td>
    </tr>
    {% endfor %}
  </tbody>
</table>

Total amount to pay:
<b>
  {{
    let
      amounts = map (\i -> i.Amount) $Items
    in
      formatNumber "%.2f" (sum amounts)
  }}
</b>
The template language is quite staightforward. You can read more about it under Report Templates. Also, you might want to learn about anonymous functions and the included functions of which we use some here.
After you click Save, and given that everything went fine, you should see a small button with a PDF symbol in every cell of the report column:
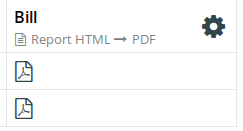
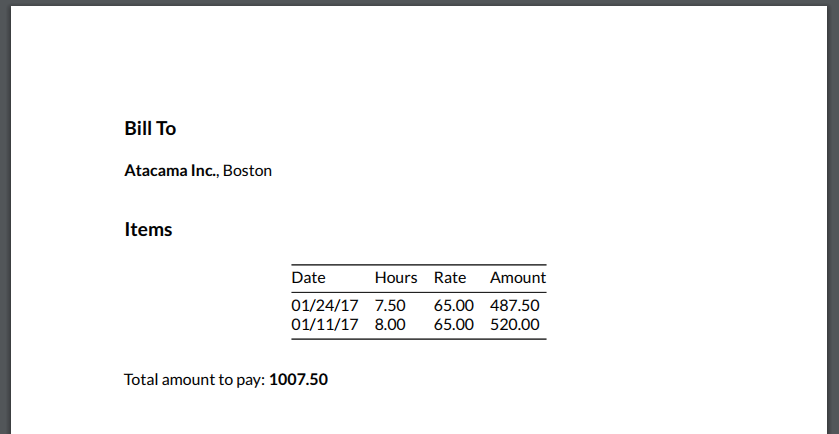
Clicking that button will open the report (your bill) in a new window. For example, the above template will generate bills like this for the first bill in the list.
Conclusion
This concludes the guide of how to build a basic Herculus app. Feel free to extend the app in various ways. For example, you could
- add a column of type
Booleanto indicate if the bill has already been paid, - add a bill number,
- calculate the total amount to pay in a separate column in the Bills table, so that you have a good overview over your bills,
- add a table of activities which describe what you did,
- or define a table of rates which are independent of your clients.